

How To Makeup A Location On An Instagram Post
Making a custom location on Instagram is i of the best ways to generate traffic to your business relationship. Information technology gives you that actress uniqueness when it comes to standing out amongst other companies. It also allows people to check in at the same location, farther promoting your account beyond other platforms.
When I was starting time hired to practice the social media for F45, creating a custom location for the gym on Instagram was one of the first things on my to-practice listing — you know, the to-do listing that never ends.
Well, I failed miserably. I tried every day for 2 weeks to add together in the custom location, but I could never discover it when I went searching for it on Instagram. I was super bummed. So I basically settled in with the thought that I suck at Instagram, social media, and ... spiral information technology, I'm going to pretend like information technology's not possible to create a custom location and move on with my life.
So, one day, the custom location but appeared, and I was every bit happy as could be.
What did I practise incorrect? I didn't update my Facebook app, which I think is a pretty common dominator in my phone life.
So first things starting time, always check to make certain your apps are up to date — in this case, both Instagram and Facebook. Since the social giant owns Instagram, you need to create the custom location on Facebook first, before you can sync it to your IG business relationship. Hither's how to practise it:
Stride ane: Turn on Location Services
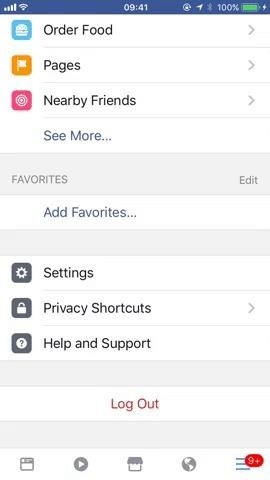
You can either enable location services through the Facebook app or through your device'due south settings. To get to the setting, start by opening Facebook, then tap on the menu button.
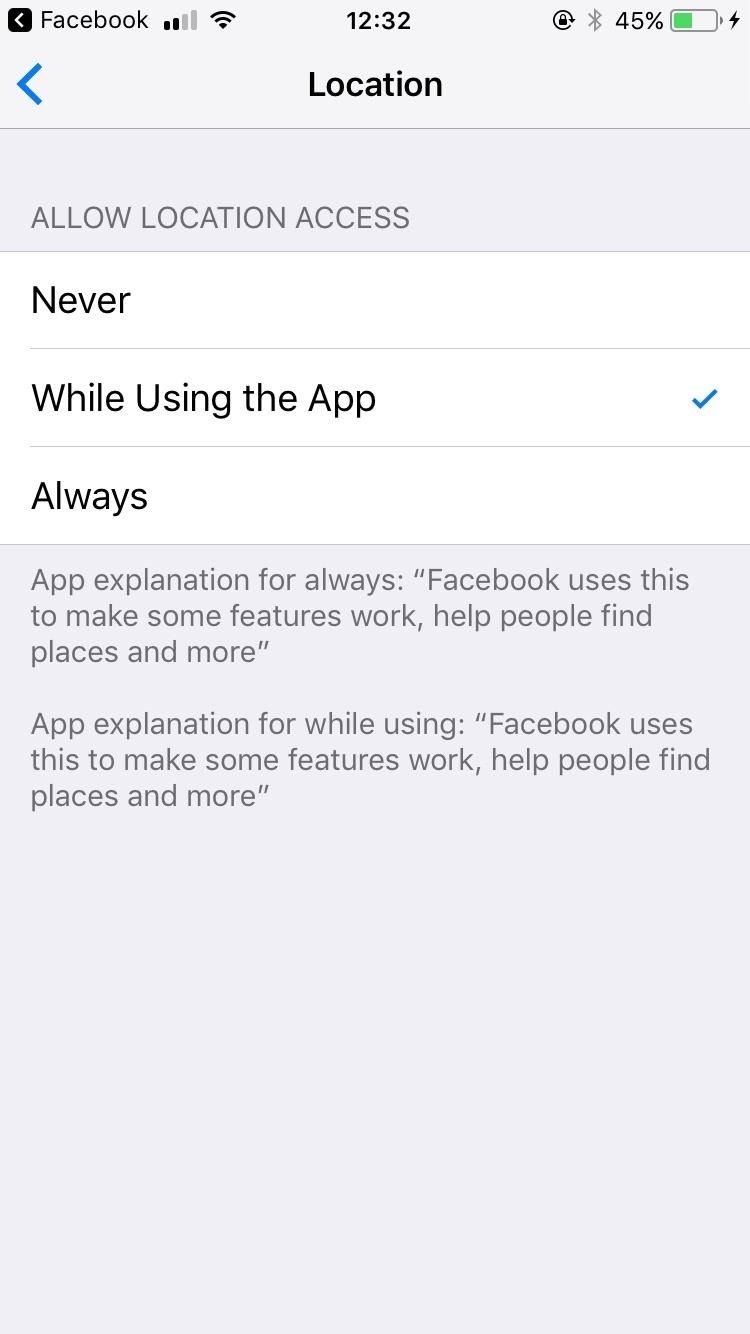
From there, if yous're using an iPhone, select "Settings," then "Account Settings," and tap on "Location." On the adjacent screen, make sure to select "While Using the App."
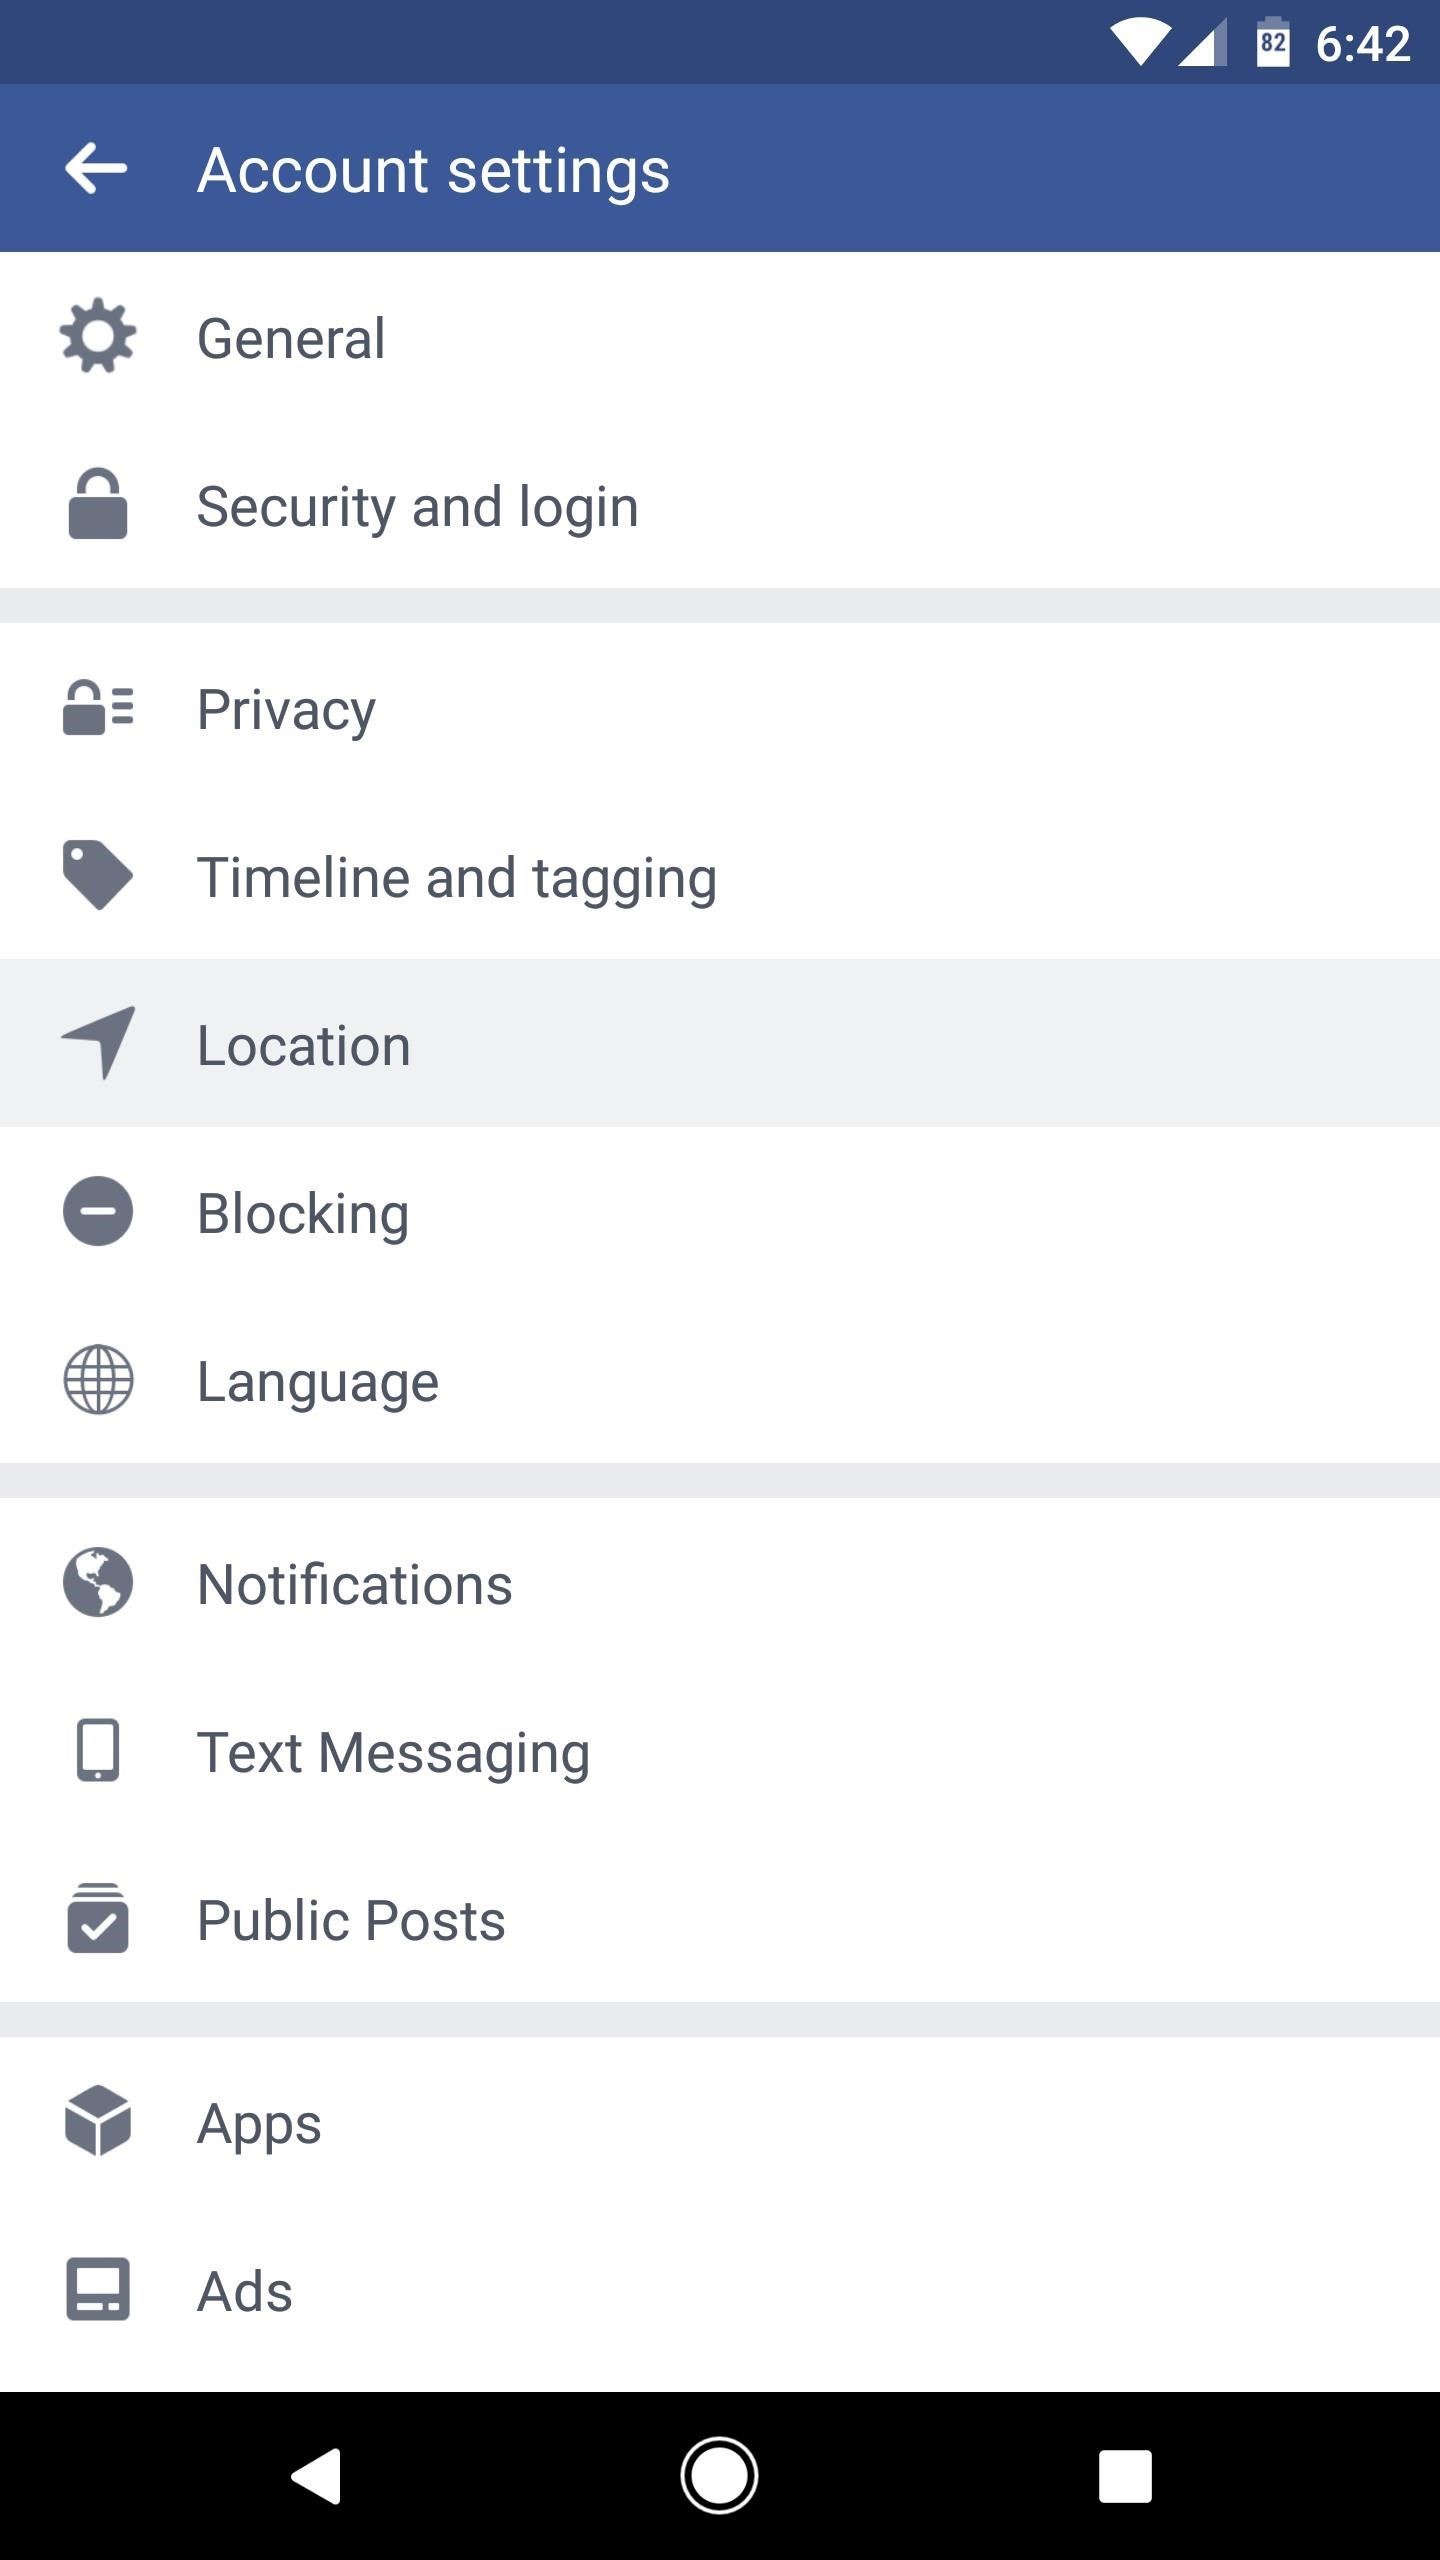
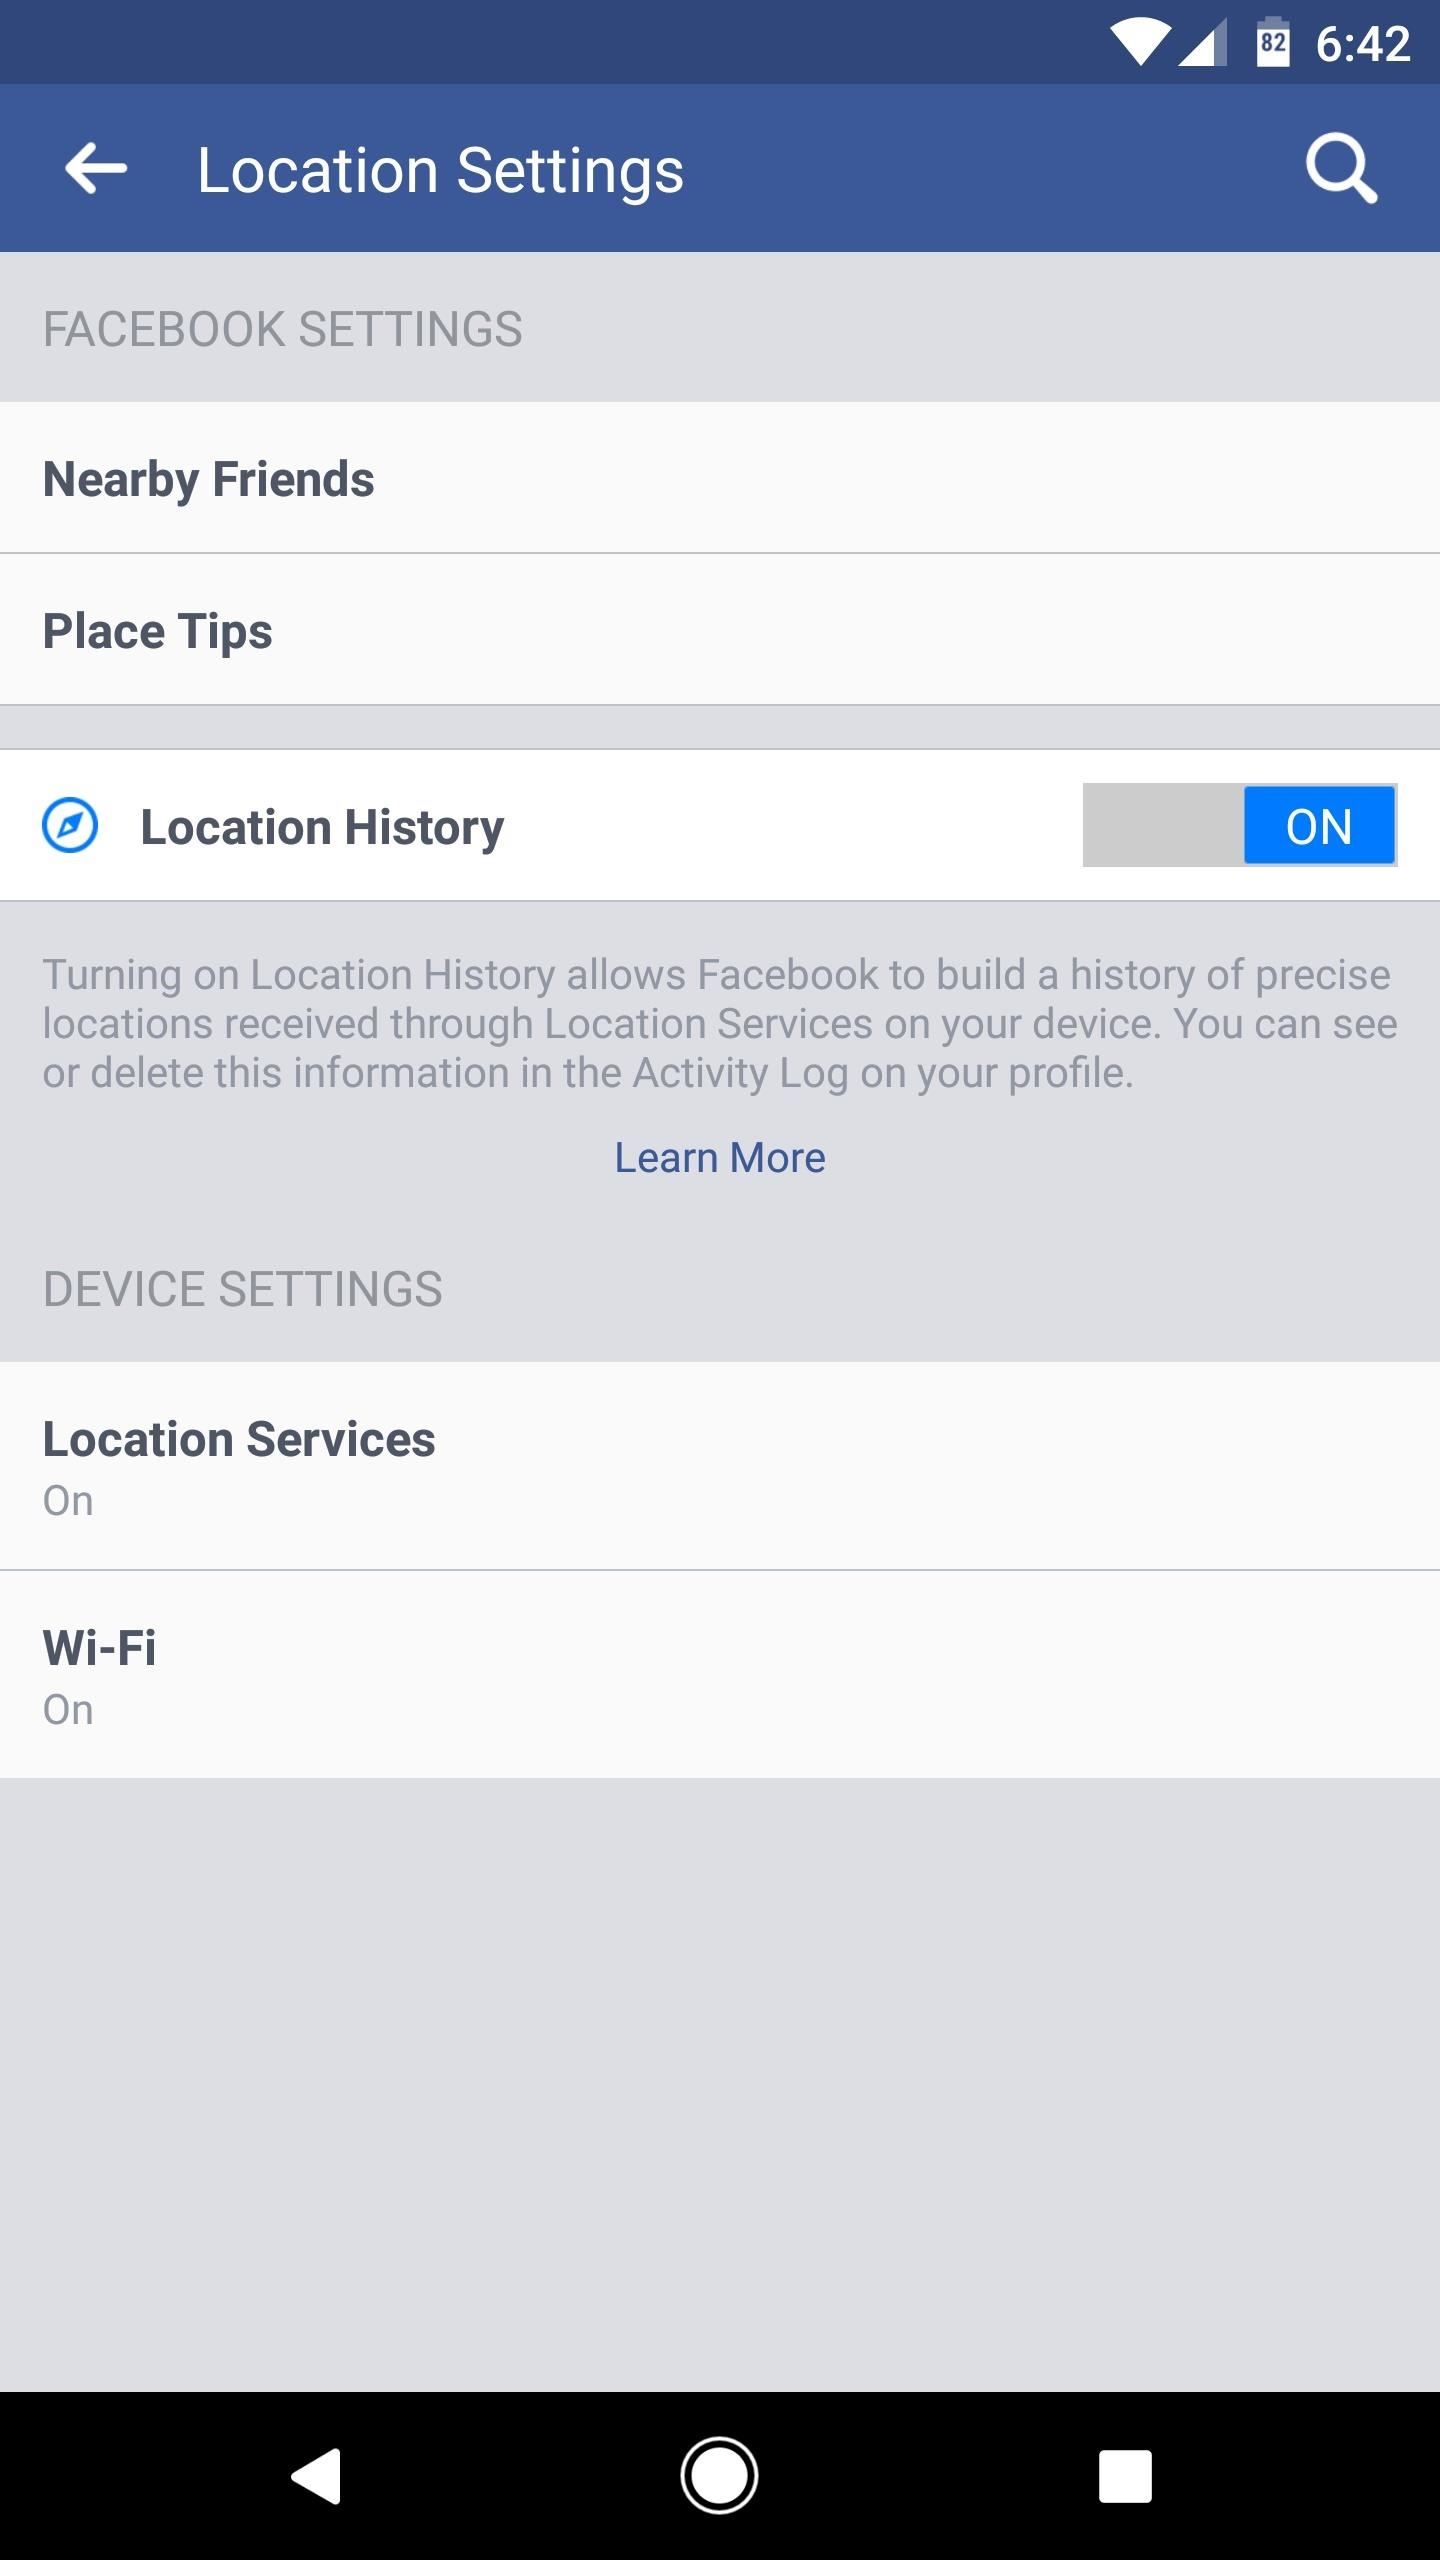
If yous're using Android, select "Account Settings," and then "Location," and make sure "Location History" and "Location Services" are both turned on. If y'all don't see "Account Settings," tap "Settings" first.
Having trouble turning on location services from within the Facebook app? So become to your device'southward settings.
If you're using an iPhone, go to "Settings," then "Privacy." Tap on "Location Services" and and then make certain it is turned on. Likewise, brand sure that Facebook is toggled on from the Privacy list.
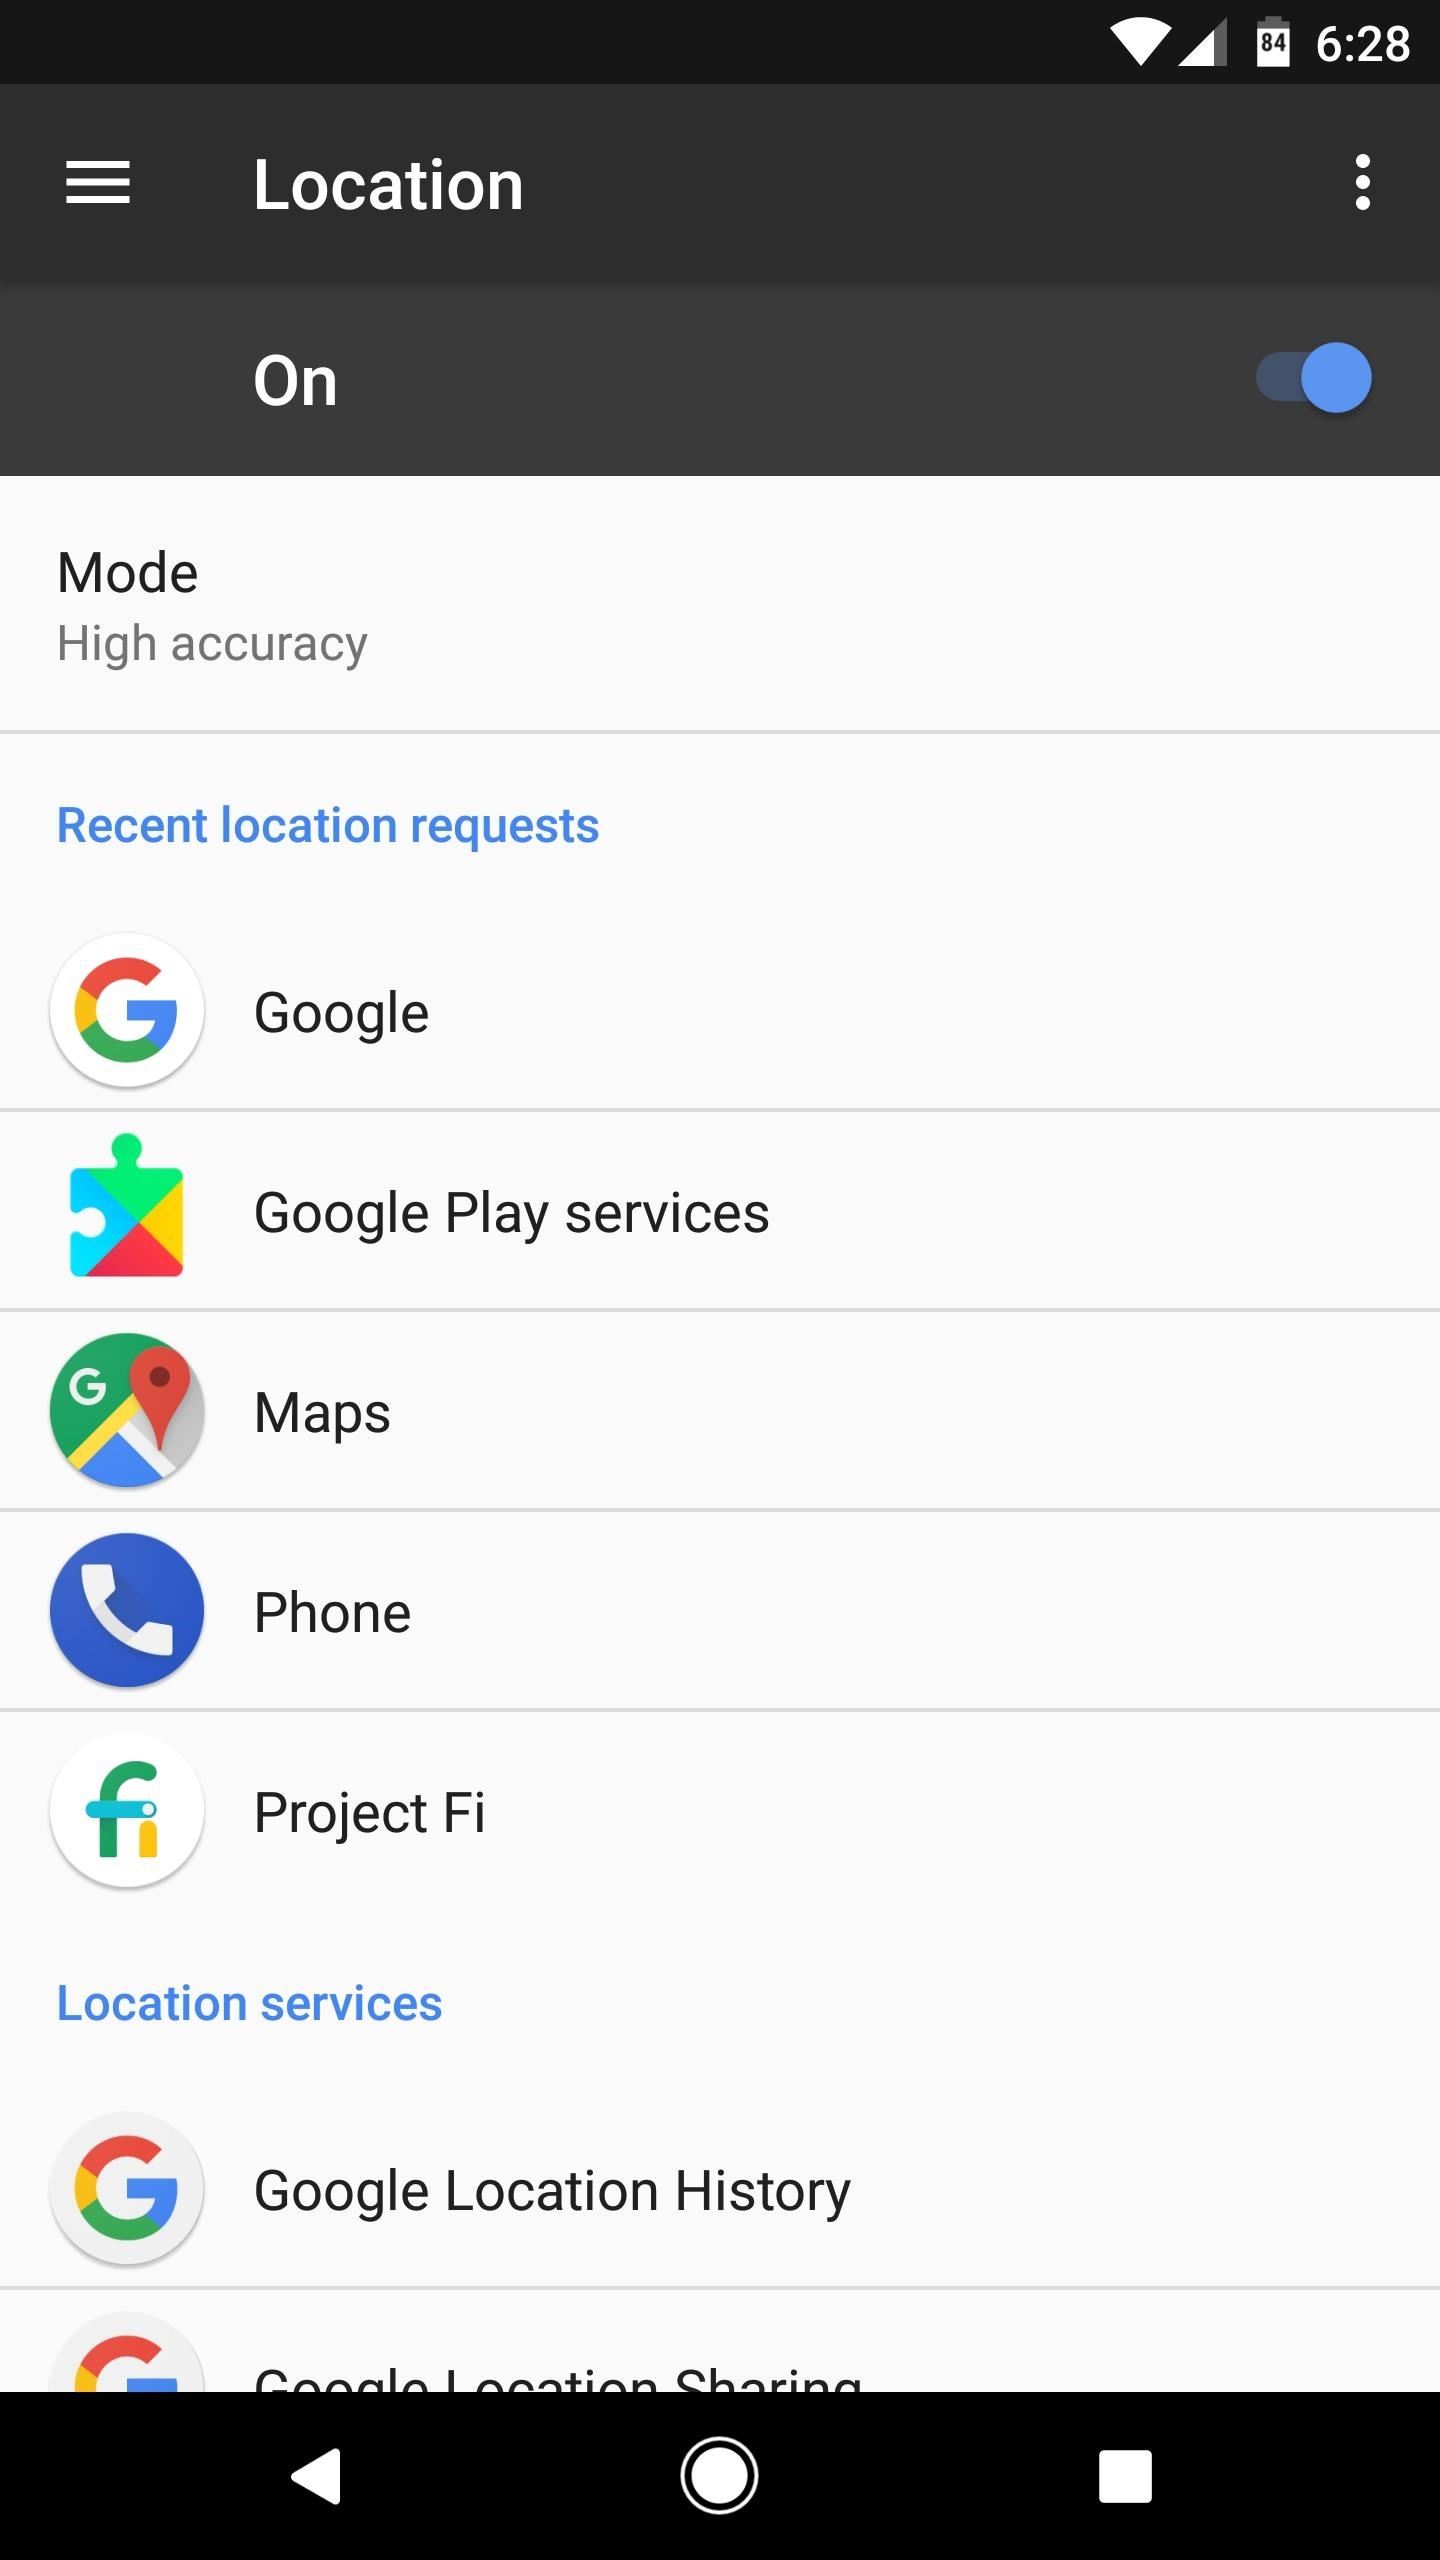
On an Android device, head to the "Location" menu in Settings (utilise the Settings search feature if you can't find it), so make sure the location feature itself is on and set up to "High accuracy." Afterwards that, get to "Google Location History" at the bottom of the screen, then make sure this service is turned on as well. Also, brand certain to go to the "Apps" department in Settings (again, use the search feature if you can't detect it), discover Facebook, select "Permissions," and brand sure "Location" is toggled on.

Footstep 2: Create a Facebook Check-in Status
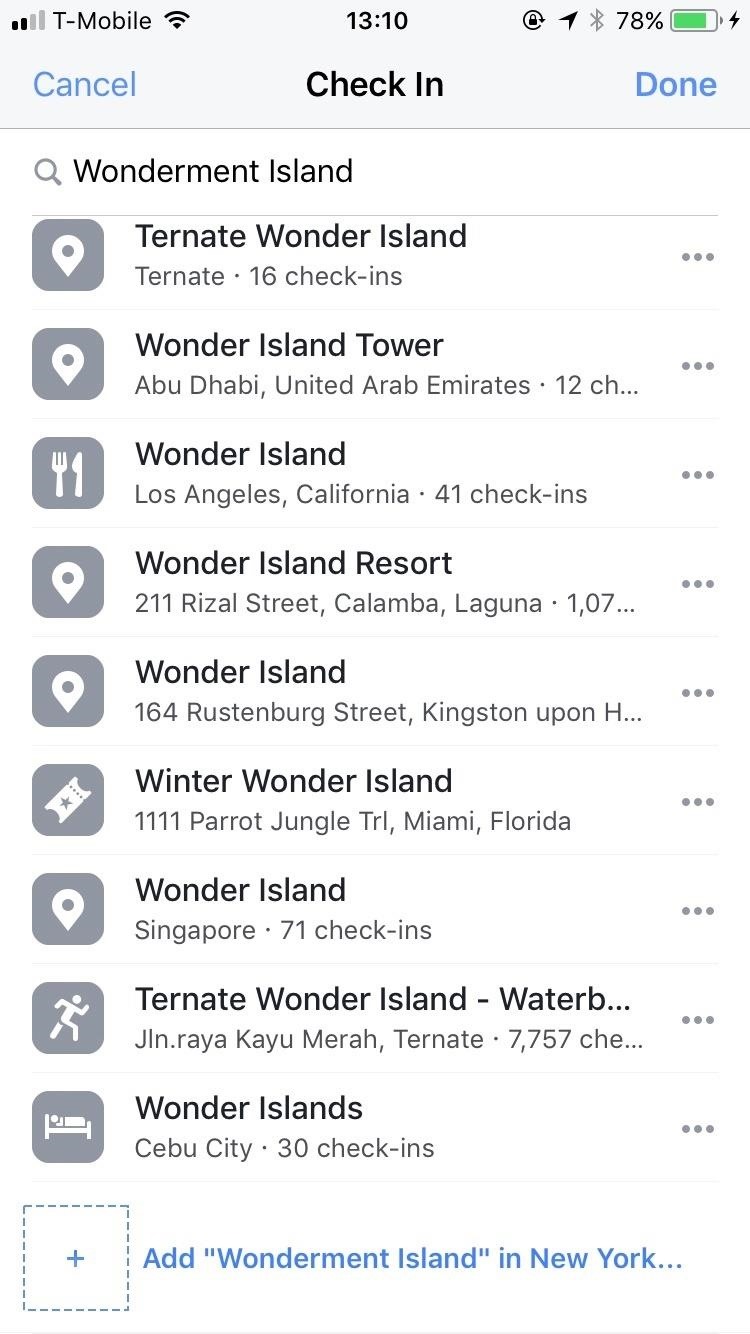
At present, create a check-in status on your Facebook business relationship. Type the name of the location y'all desire to customize into the search bar. You lot must capitalize the first letter of your location and, unfortunately, y'all cannot add in whatsoever emojis or symbols like # and @. And then keep information technology pretty straightforward.
Scroll downwards all the way to the bottom until you see "Add [Custom Location] ... " and tap on information technology.
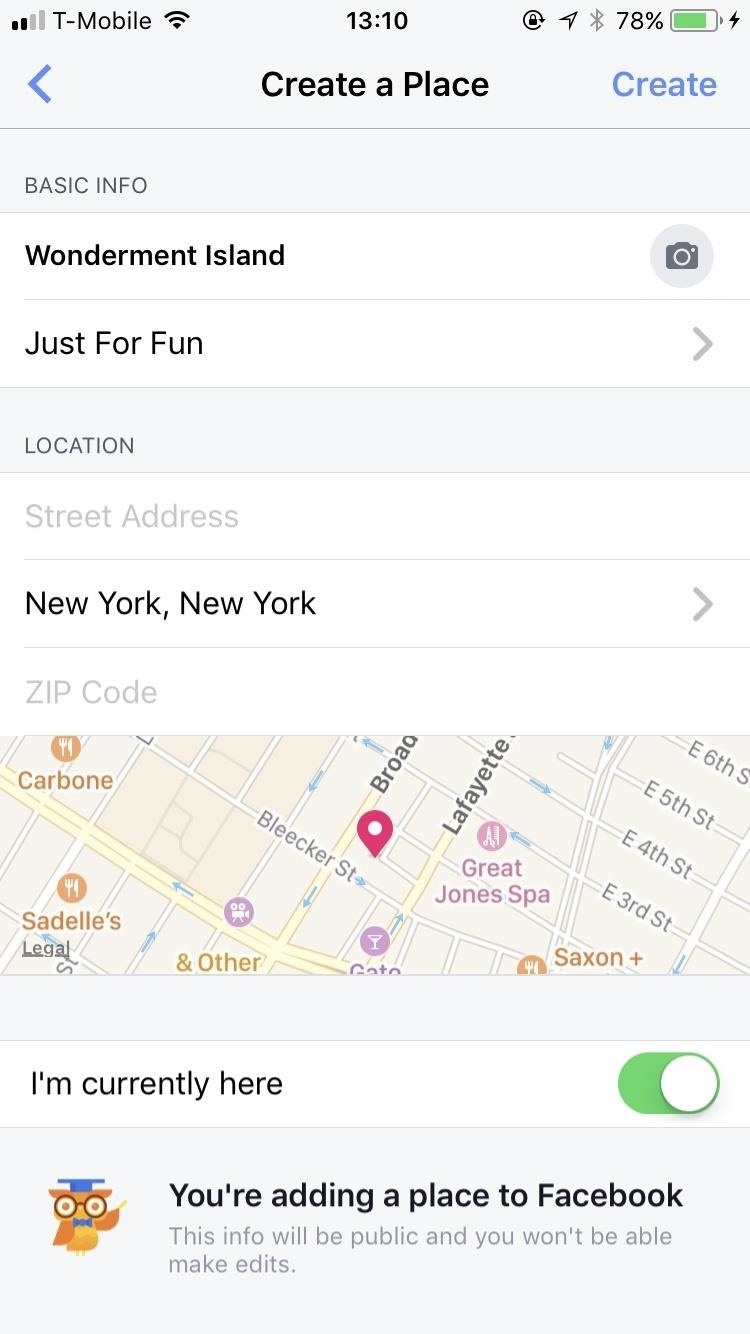
Stride 3: Create Your Custom Location
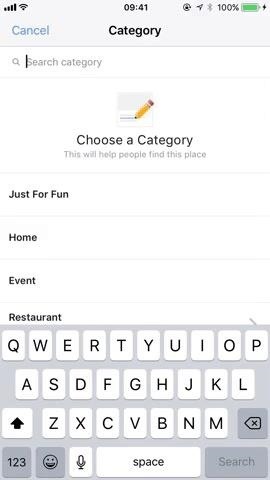
One you've tapped on "Add [Custom Location] ... " choose which category describes your location all-time. I choose "Just for Fun" because that'due south what describes my location best, but perchance yours is an event or your identify of business concern.
After choosing your category, Facebook volition ask you to choose a location. Choose "I'1000 currently here" or search for the location that you lot desire to customize and choose that instead. Then, create the location and post your cheque-in status to your Facebook.
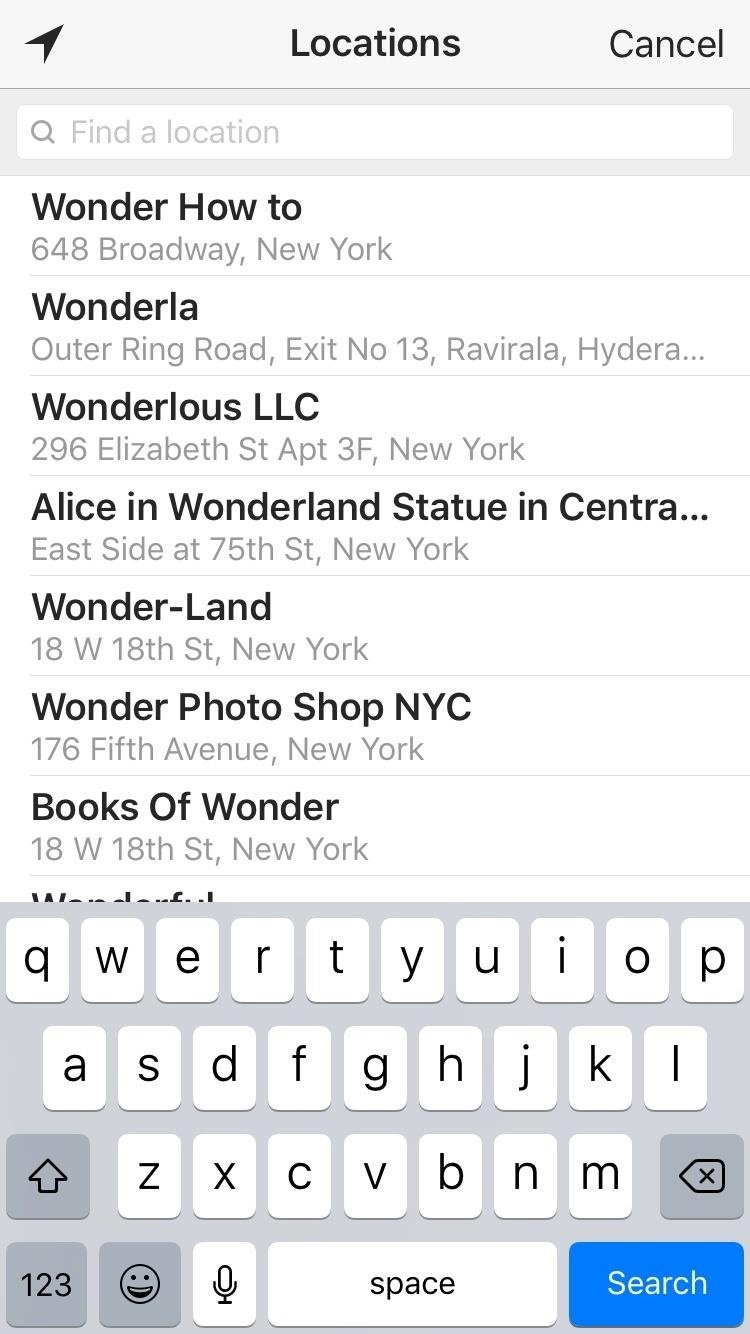
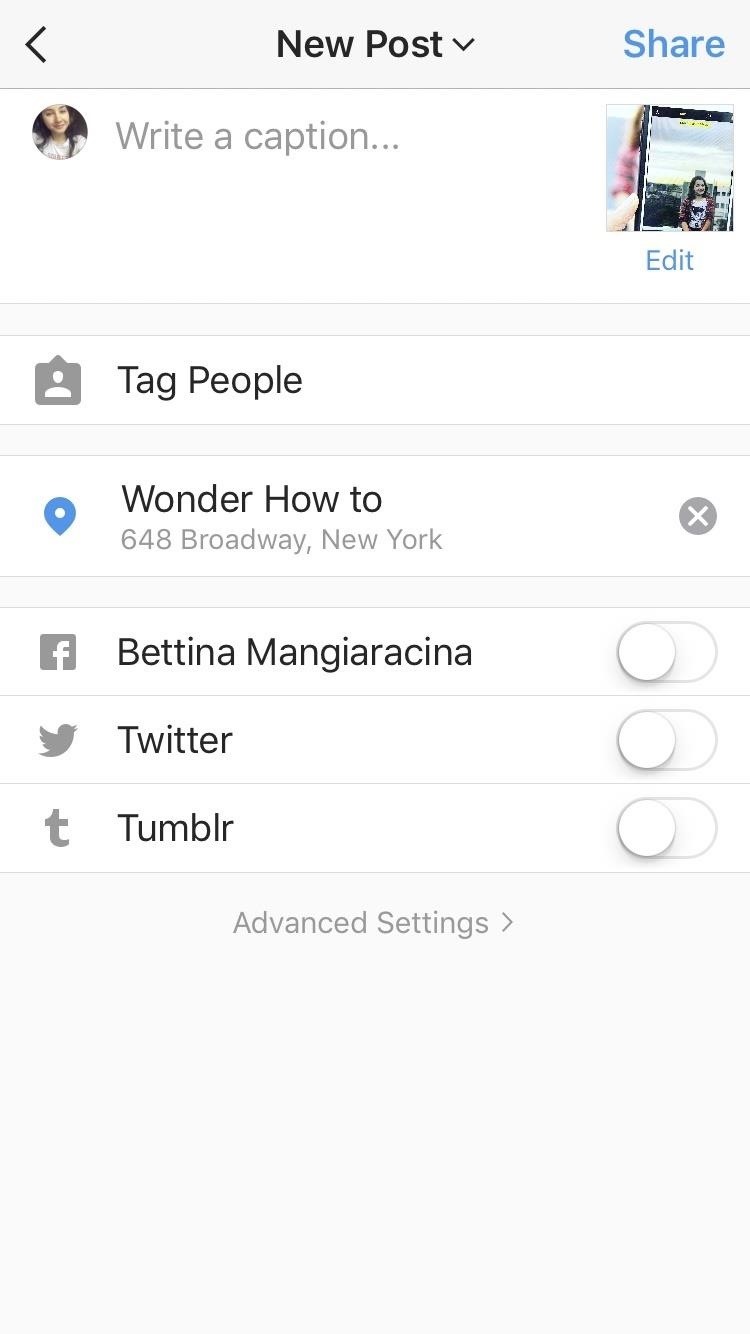
Footstep 4: Open Upwardly Your Instagram App & Create a New Postal service
To make certain your custom location is created, get to Instagram and create a new post, then tap "Add Location." Search for your recently created location in the search results. After finding it, post it to your IG and you are all set to go!
Follow me on Instagram @b3t.tina to see how I'm currently using these tips and tricks to grow my ain profile page.
Keep Your Connection Secure Without a Monthly Neb. Get a lifetime subscription to VPN Unlimited for all your devices with a one-time purchase from the new Gadget Hacks Shop, and watch Hulu or Netflix without regional restrictions, increase security when browsing on public networks, and more than.
Buy Now (80% off) >
Other worthwhile deals to check out:
- 41% off a habitation Wi-Fi analyzer
- 98% off a learn to code package
- 98% off an accounting bootcamp
- 59% off the XSplit VCam video groundwork editor
Source: https://smartphones.gadgethacks.com/how-to/instagram-101-create-custom-location-instagram-0178307/
Posted by: winfreyplarome.blogspot.com
0 Response to "How To Makeup A Location On An Instagram Post"
Post a Comment